Published: 2012-10-02 00:17:35

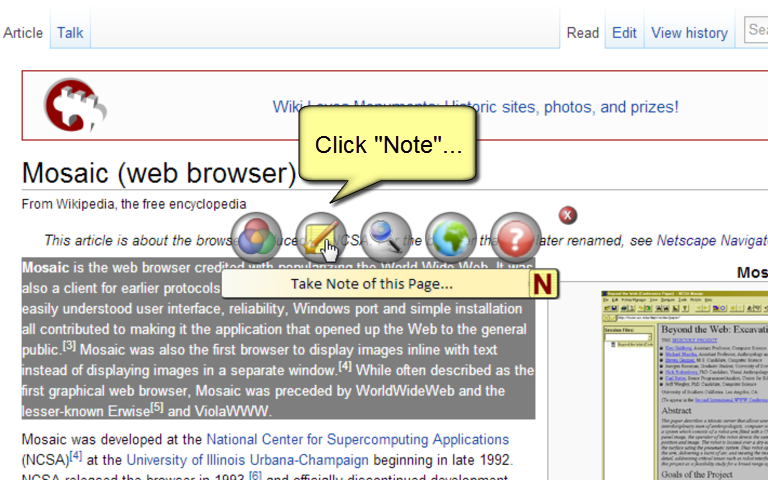
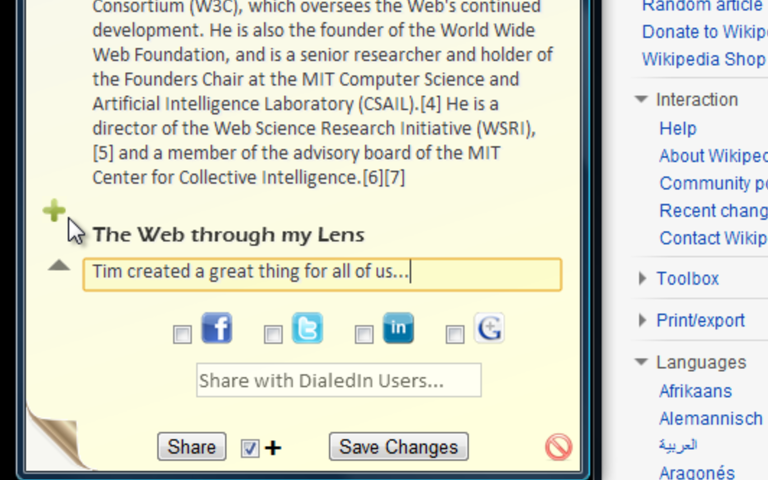
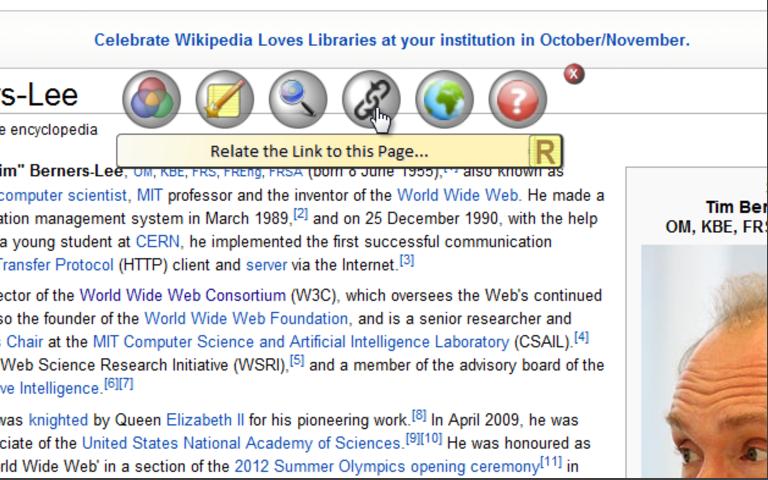
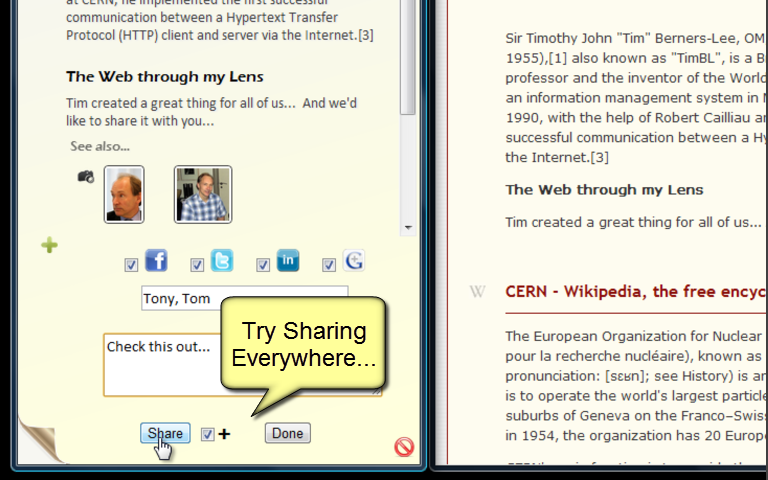
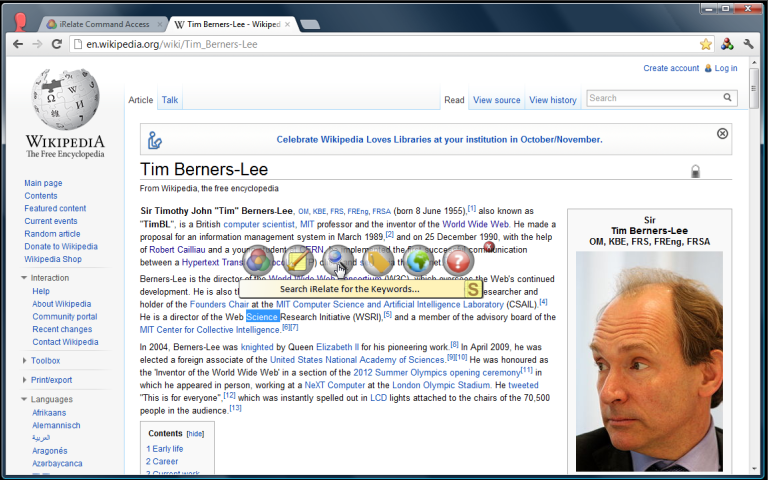
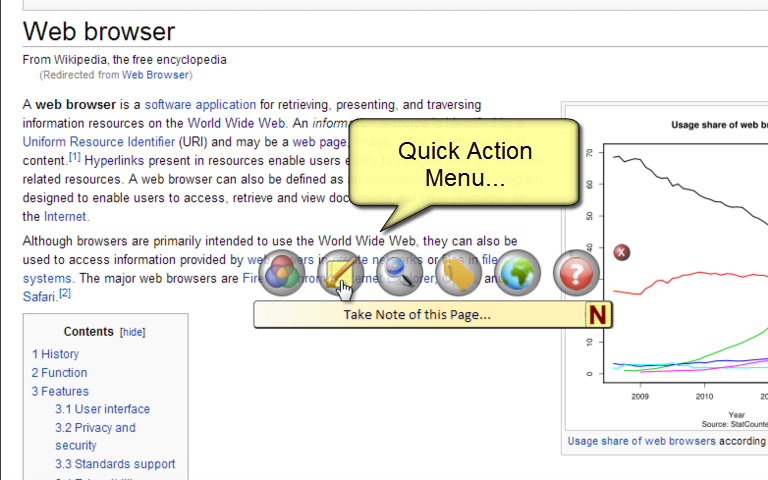
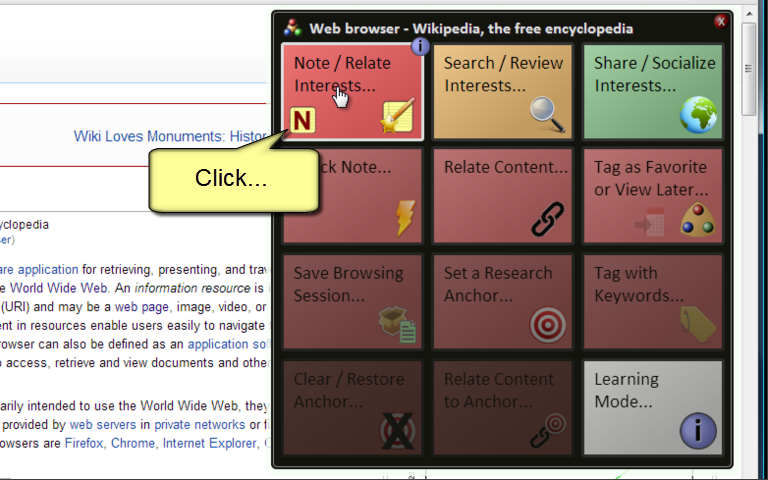
Just follow the Steps Below to see how easy it will be to build your PERSONAL WEB and PERSONAL BLOG with iRelate...

Don't jump ahead...

Just perform the simple Steps...

You will be treating this iRelate Quick Start Web Page just like any other Web Page you might Browse on the Web...

The Techniques you learn here will apply to any Pages you might Browse in the future...

Subject: Revealing the iRelate QUICK ACTION MENU...

Hover over the Image to the right for a Preview of this Lesson and then follow the instruction below...

SELECT THIS PARAGRAPH NOW... Whenever you SELECT Text from within a Web Page in iRelate, you'll be Presented with the QUICK ACTION MENU...

Hover the Mouse over the Quick Action Menu when it appears and Hover OFF to let it disappear...

Subject: Clipping Text from within Web Pages...

Hover over the Image to the right for a Preview of this Lesson and then follow the instruction below...

SELECT THIS PARAGRAPH and, when the QUICK ACTION MENU appears, CLICK the NOTE Icon... This Text will ultimate be part of your first iRelate BLOG POST...

Subject: Editing Notes and adding your own Insight...

Focus on the NOTE POPUP that has just appeared...

When you see the NOTE POPUP appear, you'll notice that the Text you have selected becomes part of your Note about the Quick Start Web Page...

Click on the GREEN "+" near the Bottom Left of the NOTE POPUP...

You can now add your own first impressions about getting started with iRelate... Just enter a few words or a sentence...

Notes belong to YOU...

By the way, you can Edit ANY of the Text in the NOTE POPUP including the Title and ANY Text you may have previously included..

Subject: Saving Changes to your Notes...

Continue to focus on the NOTE POPUP..

Click the SAVE CHANGES Button near the BOTTOM RIGHT of the NOTE POPUP...

Your new Note has been saved within your PERSONAL WEB...

This Lesson uses the Keyboard... CLICK HERE to ensure that this Page hears your Keystrokes...

Hover over the Link "Browser Extension - Wikipedia" below...

Then HIT the ESC Key on your Keyboard while you are hovered over the Browser Extension Link...

From the QUICK ACTION MENU, Click the LINK Icon...

Notice the Confirmation Message that you have RELATED one piece of Content to another...

Notice within the NOTE POPUP that the Browser Extension Link appears in the "See Also" Section...

Subject: Because a Picture speaks 1000 words...

Hover over the IMAGE to the Right...

While over the IMAGE, PRESS the MOUSE BUTTON and HOLD it for a SECOND...

RELEASE the MOUSE BUTTON...

Notice the QUICK ACTION MENU...

Click the CAMERA Icon...

Notice that the IMAGE is now included in the "See Also" Section of the NOTE POPUP...

Subject: Because your opinions matter...

Focus on the NOTE POPUP...

It reflects all of the Insight you have gathered about this iRelate Quick Start Web Page...

Click the SHARE Button near the BOTTOM LEFT of the NOTE POPUP...

You'll see a NEW TAB which will reflect YOUR BLOG POST about the Insight you gathered during this Quick Start...

Subject: Like having Google Search ONLY what you have found meaningful...

SELECT the word "BLOG" from the Paragraph below...

In the last lesson in this Quick Start, you created your first BLOG POST with iRelate...

Click the SEARCH Icon from the Quick Action Menu...

Notice the iRelate Search Results which list all of the Content within your PERSONAL WEB which contain the KEYWORD "BLOG"...

There is very little in your PERSONAL WEB right now, but use iRelate every day and you'll be viewing useful Search Results...

To get started most effectively with iRelate, let's learn how to get Guidance on all of the various Actions as well as how to most easily perform these Actions within your Natural Browsing Workflow...